Tuesday, August 17, 2010

Flower Printing

My birthday passed recently and wonderful friends gave me some beautiful flowers. I love having fresh flowers around the house! And I have also found a new purpose for them as they reach their last few days.
Whenever I have a leftover bouquet of flowers, I love to do this project with the kids. It's called flower printing. It's simple and the finished product is beautiful.
I don't wait for the flowers to die totally because if they are too dry they will just flake away as you handle them, but when they still have a little life to them, I snip some flowers from about mid stem, it's a good handle, and give a few to the kids. I try to give them a variety if possible and I snip the leaves for them as well, so they have different prints.
The kids fill their own pans with paint. I have used water color in the past and made homemade stamps but it really wears on the flowers, and can get a little sloppy. Best done by older kids, but the tempera paint version is just as nice in my opinion and easier for little ones to just dip and stamp. And that's all there is to flower printing. Just dip and stamp. Look at how beautiful the finished product is! And of course the girls loved to put the flowers in theor hair!

Monday, July 26, 2010

Sponge Painting

Alright, I've been a little busy so it's time to catch up some. Last Thursday we had a house full of girls...and Jack C...(but he didn't seem to mind or notice). Like many other times, the kids grabbed some pans for paint palettes and some tempera paint, but instead of fingers or brushes we used sponges this time. Their first reaction was to smear the paint from side to side like a brush. I watched them do that for a while and then I introduced using the sponge like a stamp. I encouraged them to used their sponge however they wanted, but they thought it was cool how it "looked like a rainbow" when you stamped the sponge and the colors didn't blend, so they gave it a try. Here are some pics!
They also took it upon themselves to put on a show. Equipped with dancing, princesses, gymnasts and even an announcer. They added a little ring around the rosie and had fun falling down!

Thursday, July 15, 2010

Lightbulb Birds

Well...it was a packed house today at Mom's Morning Out! and we welcomed a few new faces who I hope had some fun! For our art project today we marbliezed paper with shaving cream. I usually always do this with new kids and when I have a large group. It's a great art project where new visitors can feel comfortable making messes and old kids don't grow tired of! The kids had a great time getting their hands messy and a great job remembering not to put their hands near their eyes or mouths, after all "that's just for dads in the morning!" says Mayra! During our next visit to the art table, was to make our lightbulb birds. Or at least step number one in making our birds. Which by the way another great thing to recycle are light bulbs! Last night I started plastering the light bulbs so the kids would be able to paint them today. They picked out the paint they wanted to use and started painting them. Usually I do not like to do continual projects but with that big of a group other things took a longer time, so we're going to have to finish our birds when they come back. I can't wait to see the finished product, but here are some pictures of us starting them. To be continued...........And last but not least I have to introduce our newest face, certainly the greenest of them all, Mr.Frog. The kids were absolutley enthralled with Mr.Frog. Madeleine even made sure the UPS man said hello to him LOL! While they weren't trying to talk to our newest friend, the kids had fun playing in the sand table and turning the water red. And we learned that red and blue turn the water purple, even though we had some skeptics in the crew prior to mixing!

Wednesday, July 14, 2010

Scrap Collage

Today was kind of a light day, as far as the amount of kids
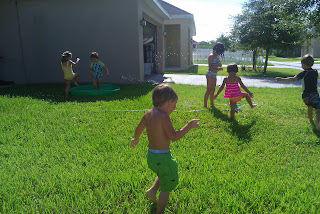
but the boys had a blast with the sprinkler today. I can't
tell you how many circles they ran around in, it made me dizzy just watching!
Today during our art time we made a collage with the scraps we had from cutting the plastic flower petals the other day. It was very dimentional and almost more like a sculpture. I gave the boys some cardstock and some glue and they glued down the scraps. They didn't stick so great so I took a hot glue gun to some of the pieces and again sealed it all with regular mod podge. They worked so intently, I think we should do the sprinkler before art time every day!


Tuesday, July 13, 2010

Marbleizing paper with shaving cream

There are a few ways to marbleize paper. But an MMO! favorite is definately with shaving cream. I get a request to do this method pretty often. Just the mere mention of the beloved word...shaving cream....fills the air with giggles galore! I give each child a sheet of cardstock or tagboard. The heavier the weight usually works best although I have done it with construction paper as well. After squirting a generous mound of shaving cream onto the paper each child picks their favorite color to add right on top of the shaving cream. Usually I use water colors because a little goes a long way. And I add the colors one at a time. If you add all the colors first, and then start to mix, it usually ends up green or brown. Here is a group two different days that are using water colors with shaving cream.


In these other pictures below, we are using tempera paint instead of the water colors. After the kids have had enough mixing I set their papers aside for a bit. Usually about 10 minutes because I cant wait any longer than that to see what they look like! That's when I wipe all the shaving cream off, usually with my hand at first and then I use a wipe. I hang them up to dry and it's as easy as that! It is one of the messiest, but it's easier than it looks to clean up. If you want to try it at home you can just have them do it on a tray or in a cookie sheet to control the mess.

I love the finished product! A dab of water spilled onto the lower right of the sheet and still made it look so cool. And the neat thing about the shaving cream technique is that your art work smells great too!

Monday, July 12, 2010

Caterpillar Sprinkler

We decided to cool things down a bit. As the days grow hotter in Orlando, some days are just not all about ART! I told all the parents to bring the kids suits and we turned the crazy caterpiller sprinkler on! It was a fun way to get all our energy out, and I even had extra hands to help out outside, what a treat! The kids had a blast....I think Mr. Crazy Legs will be visiting us again soon!

Water painting with crayon resist

I remember crayons getting so boring to me when I started discovering markers as a child. But once I learned new ways to use them, I grew a new appreciation for them. Check out these water color paintings. The kids did some drawings first with crayons and then water colored right over them. I love when they choose white crayons, but the colors turn out just as nice!

Tissue Candle Holders

Taking it a step further with the bleeding tissue paper collage we transferred that idea to glass baby food jars and made candle holders. It has a stained glass look and looks beautiful when the candles are lit.
We basically used the same concept of our bleeding tissue paper collage but there was no need for painting over with water after they glued their tissue pieces onto the jar. Instead I painted mod podge over the glass jars which sealed the tissue pieces beautifully. The kids then dropped a tea light in each holder. When lit up it really does look very pretty, I have 3 of my own! PS...I hope everyone had a special candlelight dinner at home!

Tissue Collage

So...I am catching up on this whole blog thing and becoming addicted, so I am going to post as many things that I can today.
This is one of my favorite projects to do. I did this with my very first group and I just did it again with a new group the other day. It's a bleeding tissue collage. I just LOVE how they look when they are all finished!
First I introduce how to rip tissue pieces up. The kids' first instinct is to crumble the tissue so yes I actually had to show them to just rip up the paper. After looking at me like I was alien, the kids got comfortable with the idea of shredding perfectly good, whole sheets of paper and they had at it! Here are some pictures of my very first MMO! group!
I gave the kids a qtip and they started to glue down their tissue pieces. Once they attached all their tissue, I gave them each a bowl of water and they simply painted over their collage. All the color then bleeds off the tissue. You can opt to take off the tissue for a lighter effect and get the color that actually bleeds through, but I chose to leave the tissue on. It makes it look so vibrant and adds great texture to the collage. After they dried, I painted everyone's collages with silver glitter mod podge to seal it together. You don't have to do this step, because the water acts as a sealant, but I like the weight that the mod podge adds to the paper. And since I used the glitter kind, it added a nice shimmer effect.